Wednesday, April 28, 2010

My You're Handsome or "What a healthy starter plant should look like!"

I was fortunate in my early African Violet hobby to meet several exceptional commercial growers who really prided themselves on selling the highest quality starter plants available.  This "lead by example" approach is one that I bring to my violet sales on eBay.

A few thoughts.  Single crown varieties should be, well, single crowned!  If you're buying a starter plant and can see a picture of it, such as you might on eBay, and it has more than one crown the grower is obviously not paying close attention to their inventory.  As such, I'd suggest skipping that particular purchase.

Healthy, clean and a shiny appearance.  If the starter plant doesn't have an immediate heir of health and vigor, skip it!


If the crown (main growing point) is not clean and clearly visible, skip it!  If the leaves aren't crisp and growing horizontally, skip it.


Starter plants of trailers (as seen below) don't necessarily have to have multiple crowns when you purchase them, but they should have a nice shape to them.  The foliage color should also be clean, rich and healthy looking and void of excessive scarring or damage.  If the foliage is curling, twisted or otherwise distorted, skip it!


Remember, if you're in doubt about the health of the starter plant you're about to purchase, error on the side of caution and pass on that particular purchase.

Don't forget to check out my eBay African Violet auctions by visiting my eBay store.  Click here and I'll redirect to my store.

Tuesday, April 27, 2010

I'm back!

My birthday celebration came and went with little fan fair...which is a good thing!  I want to thank everyone for the warm birthday wishes, they are always appreciated.

Look for some new posts this week on Springtails, Oyama pots and more!

Talk to you soon!

Tuesday, April 20, 2010

If it moves, its not perlite! or "How to manage a soil mealy bug infestation"

The shear mention of soil mealy bugs (a.k.a. Pritchard mealy bugs) to an African violet enthusiast is enough to send them into a panic.  Nothing creates such despair as the discovery and diagnosis that their collection is infected with these troublesome pests.  Soil mealy bugs are extremely destructive and are very difficult to kill thanks in part to the powdery wax layer (secretion) that covers their bodies.

Optimara Violets® (a.k.a. Holtkamp Greenhouses, Inc.) has a very good section on their website dedicated to the detection and treatment of pests and diseases that impact African violets.  Click here to be directed to their diagnosis and troubleshooting center (a.k.a. Dr. Optimara). 

An ounce of prevention is worth a pound of cure.  This goes for your personal health as well as the health of your violets.  Regardless of the source, ALWAYS keep new plants isolated from your primary collection for at least three months.  If a problem exists, be it soil mealybugs or something else, it will normally manifest itself within that isolation period.  If you've taken the proper precautions and you still find yourself with a mealybug problem, then here are a few suggestions:

If the infestation is limited to a few plants, it is best to discard the affected plants.  If the varieties impacted are hard to find you might consider removing a few healthy leaves (or crown in the case of a chimera) and washing them thoroughly in tepid soapy water.  Please Note:  Mealybugs have been known to lay their eggs on leaf stems and the primary stem of the plant.  This "soapy bath" does not guarantee that you've removed them but certainly goes a long way in doing so.  It is important to isolate these leaf cuttings (or crown cuttings) just like you'd isolate a newly acquired plant. 

A secondary step you can take after giving your cuttings a "soapy bath" is to treat the leaf and crown cuttings in a solution of Admire Pro, per label instructions, which contains the active ingredient Imidacloprid 42.8%.  Click here to review this pesticide which is readily available on eBay.  You'll note that this pesticide is very expensive ($169/Pint) so you will have to decide what is cheaper...replacing the infected plants or treating them.  If you estimate plant replacement at $10.00 each (plants + shipping), your break even point would be approximately 17 plants.

My thoughts on the use of pesticides:  I'm not in the practice of personally taking antibiotics to prevent a bacterial infection.  As such, I don't dispense pesticides in this manner either.  I think we're all aware that overuse of antibiotics or pesticides can and does create resistance strains of diseases (e.g. Tuberculosis; a.k.a. TB) and pests.      

Cleanliness is next to godliness.  Make sure any area where mealy bugs were found is cleaned thoroughly.  If you mat water, I strongly suggest disposing of all matting where mealybugs were found.  It is simply too difficult to ensure you've killed 100% of the bugs in the matting.  If you wick water in reservoirs, clean (preferable soak) the reservoirs in hot bleach water and rinse thoroughly.  I normally use 1 cup bleach to 8 quarts of water.

Remember, if it moves....it ain't perlite!

Sunday, April 18, 2010

"The Nursery" or "What to do with immature plantlets"

Often when you're potting up plantlets from leaf cuttings you'll have plantlets that aren't quite large enough to warrant their own pot but don't deserve to be sent to the compost pile either.  

What I do with these immature plantlets is pot them up into a communal "nursery".  I use a 3" pot and fill it with my regular potting mix and top dress it with vermiculite (the vermiculite prevents the small plantlets from settling/sinking into the potting mix).  As you can see, I can easily fit seven immature plantlets in the nursery.  These "babies" are generally ready to be potted up into their own pots in 6 to 8 weeks or you can leave them in the nursery longer if you're not ready to deal with them. 

If you're short on space, this is also a great space saver.

The first picture was taken April 18, 2010; the second picture was taken May 19, 2010.  You can see how quickly they grow. The plantlets are large enough now to safely transplant into their own pots or can be left in the nursery for another month.

Saturday, April 17, 2010

Repotting Into a Wicked Pot or "An Ilustration of Wicking"

The original intent of this blog entry was to demonstrate how I install wicks into pots but it will actually teach you three things:

1.  How to install a wick;
2.  How to transplant a small starter plant;
3.  How to use a modified form of Texas Style watering;

Things you'll need:

1.  #18 Nylon cord - I buy mine at WalMart (it's cheaper than Home Depot).  The #18 since works great for me on pots up to 4".  If your 4" pots don't seem to be getting enough water, use the #36 size nylon cord.
2.  Pots - I use 3 ounce Solo cups (actually I use the WalMart or Kroger knock-offs because they are about 1 mill heavier than the Solo brand);
3.  Soldering Iron - Required to burn two holes in the bottom of the pot (Warning:  Do this outside on a day with a slight breeze as you don't want to inhale the fumes.  I also recommend wearing a protective mask).
4.  Perlite - Course grade (about the size of a small pea if you can get it)

Step 1 - Cut the nylon cord into 6" lengths and insert in pot (Image 2).  Leave half inside the pot and half outside of the pot.


Step 2 - Add 1/2" to 1" of perlite to the bottom of the pot (image 4).  This layer of perlite provides a great air exchange area for your plants' rot system.  You'll be surprised how this improves your plants' root system.


Step 3 - Add approximately 1 heaping tablespoon of potting mix on top of the perlite and then lay the wick on top of the potting mix so it circles the edge of the pot (image 5).


Step 4 -Place the plant you're transplanting on top of the potting mix in the pot.  If it sits too low, add more potting mix.  The goal is to have the bottom row of leaves at or just slightly above the rim of the pot.  Note:  The black line indicates the level of the perlite in the pot (illustration purposes only).


Step 5 - Fill in the pot with potting mix (image 7).  I dress the top of the potting mix with some vermiculite as it prevents excessive settling of the potting mix when you give the plant a drink and I think it makes the plants look nice.  Plus, Ray Pittman does it so if he does it, it can't be all bad!


Step 6 - Using a water bottle (pictured below), give the plant a good drink of water by watering around the top of the pot with tepid/warm water until it begins to flow out the bottom.  Place re-potted plant on matting or a water reservoir.


Click here to visit my eBay store to see what violets are available this week! 


Friday, April 16, 2010

Mat Watering or "The Lazy Growers Watering Method"

I say it's lazy because you can dump water and go.  My schedule is so busy between the regular 8-5 job (which has me traveling a lot); the gift store that I own and the violets that this watering method is used out of necessity!

While not the best picture to illustrate mat watering, the picture below is one of my many trays that has an acrylic matting material lining the 22.5" x 12" perma-nest trays.  The matting is gray and if you look closely, you can see it runs the entire width and length of the tray it lines.

If the plants on the matting are still moist but the mat has dried or nearly dried out, I'll add 2 cups of tepid/warm water to the tray by simply pouring it into the tray (dump the water and go!).  It's easy.  If the plants have dried out a bit, I will generally add about 2.5 to 3 cups of water to the tray as the plants will absorb quite a bit of the initial water that is added to the tray.

Pros to matting:
1.  Easy;
2.  Reliable;
3.  Increases humidity around plants

Cons to matting:

1.  If one plant sneezes, they all get colds!  Meaning, pests and diseases are easily passed from plant to plant;
2.  The matting will normally dry out in 2-3 days but the plants will normally remain moist for another 2-3 days.

I buy my matting from the Violet Showcase.  The matting they sell is actually the insulation used in ski boots.  It's very durable and can be washed and reused over and over.  I find that this matting will last 3-5 years before it requires replacing.  Click here for a better picture of the acrylic matting I use inside of the Perma-nest trays.


Violet Showcase

3147 South Broadway
Englewood, CO 80113-2423
303-761-1770
www.violetshowcase.com

Click here to visit my eBay store to see what violets are available this week!


"Killing me softly with your love...." or "How overwatering killed your violet"

Roberta Flack wasn't singing about African violets...at least I dont' think she was...but you can definitely kill your violets softly with too much love.

Overwatering is without question the number one killer of African violets. This, I believe, is the result of the new grower simply not understanding the moisture needs of African violets.  Potting mixes that are saturated with water are a breeding ground for crown and root rot which are death sentences for your violets.

Violets enjoy a potting mix that is moist, not soaking wet. I would describe moist as the water content present in a lightly rung out sponge. There is still plenty of moisture for the plant to use but it's not dripping wet.

Remember, if you're going to error with respect to watering your violets, less is far better than more.

Click here to visit my eBay store to see what violets are available this week!

Thursday, April 15, 2010

Look who's coming to dinner! or "What's new from Hortense!"

When I visited the Pittman's in November they were quite excited about their newest introductions that they were grooming for the Texas state show (a.k.a. Lone Star African Violet Convention).

One, of the many, that caught my eye was Jolly Playmate.  The blossom color resembles that of a chimera blossom but this one comes true from leaf cuttings.  The foliage, as you can see, shapes nicely (this, despite growing it on the very end of the stand and not turning it at all!).  When foliage grows this symmetrical and flat in less than desirable lighting, you can imagine how it will perform when given a little better spot under the lights.

I expect to have starters of this variety available in June!  

Click here to visit my eBay store to see what violets are available this week!


Wednesday, April 14, 2010

Water Reservoirs or "The Vacation Saver!"

Show me a violet enthusiast and I'll show you someone who doesn't like to take a vacation that is longer than three days for fear their plants will dry out during their absence.

One of the great things about violets is they are very adapt to being wick watered.  The following pictures demonstrate how to wick water a violet.


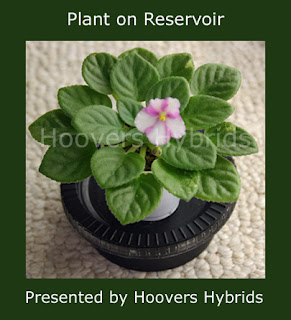
You'll notice that these 8 ounce reservoirs (saucers with lids) have a hole in the lid where the nylon wick is lowered into the water.  8 ounces of water will easily keep a plant in a 3 ounce Solo cup (2.5" pot) watered for 10-14 days.  In order for the wicking action to start, both the potting mix in the pot and the wick need to be moist.  This is easily achieved by slowly pouring tepid water from the top of the pot until it runs out the bottom.  Once the reservoir is filled with water and the potting mix/wick are moistened, the following picture shows what the end result will look like!


These reservoirs can be purchased through Cape Cod Violetry.  You can email them at violets@cape.com to obtain a free catalog in PDF.

Why are the reservoirs black?  I spray paint them black to prevent algae from growing in them.  It's a BIG time saver every month!

The Astrodome! or "Where to start leaf cuttings and harden off plantlets"

Starting new plants from leaf cuttings is fun and is certainly an economical way of increasing your inventory.  This method works quite well for me and I'm sure it will work well for you too!

What do you need to start?

1.  3" pots (just a preference, other sizes can be used)
2.  22" x 12" Perma-nest tray
3.  Hard plastic vented humidity dome

The 22" x 12" Perma-nest trays can accommodate eighteen 3" pots comfortably.  I can normally start six (6) semiminiature leaves in a 3" pot (pictured) and a few more than that if starting smaller miniature leaves.  As an average, I put eighteen 3" pots into a tray, with 6 leaves per 3" pot.  Each leaf will produce about 3.1 plantlets for me so I will normally yield about 330 plantlets from one tray.  Yes, that's a lot of plantlets!


Where can you buy the supplies?

I've been buying my supplies from the Cooks at Cape Cod Violetry (violets@cape.com) for a number of years.  They are friendly, fair and affordable.  You can send them a catalog request via email (violets@cape.com) and they will send you their catalog in PDF format for FREE!

Click here to visit my eBay store to see what violets are available this week!

"The Stand"...and I ain't talking about Stephen King's book!

Affordability is definitely relative to your income but here's a great plant stand that I believe can be squeezed into most budgets.

These chrome stands are readily available at Home Depot, Lowes and Costco.  I found Costco in my area to be the cheapest at a cost of $84.00.  The florescent light fixtures were purchased from Home Depot and cost $27.66 each.  The florescent light bulbs were also purchased at Home Depot at a cost of about $5.00 for either two warm white or two cool white.  I do like to use a combination of one warm and one cool white in each fixture.

Note:  The stand actually comes with six (6) shelves.  The one pictured uses five (5) of the six with a shelf spacing of 15".  You notice that the four supporting poles have notches that are at one inch increments.  If you want to grow standard size plants, I'd only use four (4) shelves and increase the shelf spacing to 20".

Total investment (pre-tax) is $214.64.  A professional plant stand that won't grow plants any better than this one can easily cost $800.


Tuesday, April 13, 2010

"Fuzzy Wuzzy was a bear..."

D'oh, I'll never get that out of my head now!  

Every so often Ralph Robinson will release a variety that really catches my eye and this is one of those varieties.  Rob's Fuzzy Navel (don't get me started on the name) has a very understated beauty and elegance.  Its simplicity is part of its appeal for me.

Rob's Fuzzy Navel (8735) 07/25/1998 (R. Robinson) Double peach-pink star. Dark green, pointed/red back. Semiminiature


Exhibited by:  K. Froboese at the Lone Star African Violet Convention (Kerrville, TX 2009)

Bogeyman isn't the Boogie Man...at least I don't think it is!

I have a love/hate relationship with this variety which would explain the "now you see it...now you don't" status it holds within my collection.  Some years it grows perfectly for me...the next, not so much!

Still, if you happen to run across this vintage variety I wouldn't hesitate adding it to your collection.


Bogeyman (5071) 10/06/1982 (R. Scott) Semidouble red-purple/thin darker edge. Variegated, plain, quilted. Semiminiature

Monday, April 12, 2010

The Photography Gets Worse!

Just when you thought my photography couldn't get worse...it does!  Unfortunately Ness' Red Flash is the victim of my less than competent photography.  At least it gives you an idea what a great show plant this variety made.  Wow, I grow a pretty good show plant!

Ness' Red Flash (7467) 01/02/1991 (D. Ness) Semidouble fuchsia-red pansy. Dark green, plain, quilted/red back. Semiminiature


Take My Camera...PLEASE!

To be fair some of these pictures were taken over 15 years ago...well before there was any hint of digital cameras.  Still, my photography skills weren't great then and have only marginally improved in 15 years!

The picture does illustrate two things:

1.  I can grow a decent show plant (grin)
2.  Rainbow's Peewee Nocturne is a great little plant!

Fortunately I'm still growing this variety and occasionally offer it on eBay.

Forget what's good..."What's New?" Part III

This variety happens to be on my personal "Most Wanted" list and I'd LOVE to find a leaf or starter plant of it...HINT, HINT!  The description may sound rather ordinary but make no mistake, this plant was a little powerhouse with perfectly symmetrical foliage and a bloom count that was simply remarkable.

Sweet One (H. Pittman) Semidouble rose-pink. Dark green, plain. Semiminiature


This plant was also exhibited at the 1988 AVSA convention in Dallas, TX.  I believe the grower was Linda Bjorkman.

When I was stationed in San Antonio I lived near Ray and Hortense Pittman and exhibited this variety at our local club show, Magic Knight AVS.  While there was much debate over whether my plant should have won Best-in-Show, it was awarded 2nd Best in Show and Best Semiminiature.  When I disbudded it following the show, it had 144 blossoms on it!

After showing it locally, it became quite the staple at the Texas State Convention for a number of years.  I don't recall what happened to my original plant but it somehow managed to slip from my collection.  D'oh!

Forget what's good..."What's New?" Part II

Lyndon Lyon Greenhouses produced some excellent varieties in the past twenty years and this variety is no exception.  One common characteristic of the Lyndon Lyon hybrids is the very erect blossom stems.  You'll notice this characteristic with Sea Princess as well as Sweet Treat which was previously featured.

Sea Princess (6751) 11/02/1987 (S. Sorano) Semidouble blue star. Variegated green and white, plain, ovate. Semiminiature


This plant was also exhibited at the 1988 AVSA convention in Dallas, TX.  I believe the grower was Patricia Champagne.

Forget what's good..."What's New?" Part I

There's a syndrome in the violet world known as the "What's New Syndrome".  We don't seem to be overly concerned if a new variety is good or better than what we're currently growing, just that it's new.  After all, we are a society that likes our new shiny objects and loves to dispose of the "old" ones.  What is one of our favorite sayings, "Out with the old and in with the new"?  Remember, there is a little truth in everything we say! 

Unfortunately, this fascination with "new" has lead to the extinction of many exceptional violets over the years.  I've dug into some of my photo archives and offer you a look at some of the violets from days gone by that are likely no longer in circulation.

Sweet Treat (L. Lyon) Single rose-pink. Red-backed. Semiminiature


This plant was exhibited at the 1988 AVSA convention in Dallas, TX.  I believe the grower was Patricia Champagne (BTW, Hortense named a plant after her...Pat Champagne).


Friday, April 9, 2010

What's Blooming in the Plant Room? Shirl's Hawaiian Lei

It's unfortunate that Shirley Sanders didn't see how popular this variety would become in just a few short years.  I remember her telling me as the number of hybridizers diminished, "I'm just going to start hybridizing myself!"  Boy did she!  This variety is simply stunning and has been consistently winning top awards since it was released in 2004.

Shirl's Hawaiian Lei (9372) 09/30/2004 (S. Sanders) Single purple pansy/white eye. Variegated medium green and white, heart-shaped. Miniature


And miles to go before I sleep - or - "How far should my plants be from my florescent lights?"

You know what I love about African Violets? They're great communicators! Do something they like and you'll see it. Do something they don't like - and you'll see that too...much to your dismay!

Proper light is so important to your violets' overall health and happiness. Give them too much and they'll quickly display their dissatisfaction. Give them too little and they will also pout. Give them just the right amount of light and they'll reward you with a flurry of blossoms.

Your plants will tell you exactly how far they want to be from their artificial light source. However, a good general rule is to suspend your light fixtures 8 to 12 inches over the foliage. How can you tell if you have the correct distance?

Too Much Light:

Tight Centers (crowns) - if your violets are too close to the lights or the lights are on too long the center leaves with begin to get very tight and brittle. The foliage may also grow downward in an attempt to move away from the light.

Too Little Light:

Reaching for the Stars - if the foliage on your plants is growing upward (reaching) and there are lots of gaps (openings) in the foliage, chances are you're growing them too far away from the light source. Sparse bloom is another obvious sign the plants are not receiving sufficient light.

Movin' On Up or "When to repot your violets"

Unlike the Jefferson's we won't be movin' our violets into an east side apartment in the NY city skyline; rather, we'll be moving them into some fresh potting mix that will make them feel as if they've just moved into a NY city penthouse!

If you can't remember the last time you gave your violets' potting soil a freshening up it's probably time. I prefer to keep the following time table in mind when it comes to repotting my violets:

Standards: Every six months. This assumes they are growing in a 4" to 5" pot. If you have recently acquired a standard starter in a 2 1/2" pot (or 3 ounce Solo cup), you'll probably want to move that into a 4" pot within 60 days of receiving it.

Miniatures/Semiminiatures: You can definitely stretch it to every six months but that is definitely a stretch. I prefer to repot my minis and semis every four months.

Trailing Varieties: Trailing varieties are treated a little differently because of the way they are transitioned into larger Azalea pots (short and squatty) as new crowns (drops) are grown. I typically start them in a regular 3 ounce Solo cup and transition them into a 3" squatty pot about 4-6 months after they were originally potted up into the Solo cup. After that initial transition, you'll be potting them up into a 4" to 5" Azalea pot. Moving them up to a 4" squatty pot will normally occur 4-6 months after they were moved up into the 3" pot. After they've been promoted to a 4" squatty pot or bigger, you'll want to repot into the same size pot (removing some old potting mix and adding new) about every 4-6 months.

Thursday, April 8, 2010

It's a bird...it's a plane...no, "It's an e-book!"

It's amazing what you come across on the Internet...even when you're not looking for anything! I don't recall what exactly I was looking for recently when I came across this e-book on African Violets created by Nancy Schoepflin who owned and operated Rainbow Violets.

This was actually a timely find because I do get asked frequently for basic information on growing African violets and this e-book fits the bill! The download if free for personal use.

Click here to download a copy of the e-book at no cost. Remember, by downloading it you agree to only use it for your personal use! Also, the document is about 4MB so if you have a slow Internet connection, you may want to kick off the download just before you call it a night!

Interested in other African Violet reference books? May I suggest Pauline Bartholomew's, "Growing to Show". Click here and you'll be redirected to the African Violet Society of America's website where you can purchase the book. The cost for AVSA members is $16 (cheap!) and $24.50 for non-members (still cheap!).

What's Cooking? or "Pasteurizing your potting mix in the microwave!"

Oh do I get some looks when I start "nuking" my potting mix in the microwave! Yes, it does create a funny smell that I like to describe as "earthy" but it's not so bad...really, it isn't!

As a matter of course I don't pasteurize my potting mix (Premier Pro-Mix BX) when I'm using it to pot up plantlets from leaf cuttings or when I'm transplanting an otherwise established plant.

I do pasteurize the potting mix for my leaf cuttings, when I'm putting down sucker cuttings of chimera starts or sowing seeds that I harvested from my hybridizing efforts.

I learned this microwaving technique quite by accident one day when surfing the TV channels and came across Martha Stewart sowing fern seeds. If you Google "Microwave Pasteurization" you'll find quite a bit of very scientific research that has been accomplished on the topic.

In a microwave safe 2.8 liter container, add 2.8 liters (give or take and not heavily packed) MOISTENED potting mix to the container. Place the lid for the microwave safe container on the container and microwave on high for 3 minutes. Did I mention the potting mix MUST be MOISTENED?

CAUTION: The potting mix will be VERY HOT.

Carefully remove the container from the microwave using heat pads. Remove the lid to allow the potting mix to cool to a temperature that is safe to work with.

Wednesday, April 7, 2010

Too Much Variegation? Break out the Epsom salts!

Did you know...

If you have a problem with a variegated variety becoming too variegated you can solve the problem with a common household staple.

Mix 1 tsp of Epsom salts to a gallon of tepid water and pour a sufficient quantity of the solution through the top of the soil until it begins to run through the bottom of the pot. One application is normally sufficient to kick start the green!

Monday, April 5, 2010

eBay Auction Mania!

I normally don't list eBay auctions during the week but I just ran out of time on Sunday so I'll be doing five day auctions for all my listings this week. I expect to get about 80 out this week.

There are some real beauties this week so take a peek at my eBay store for the full list! Click here to be redirected to my eBay store!

Sunday, April 4, 2010

The Rockstars! or "My personal violet favorites"

Beauty is in the eye of the beholder! While these varieties may not top everyone's list of favorites, they certainly top mine!

In an effort to avoid writing a novel with this blog entry, I've limited my favorites to three per type.

Miniatures

Damas (A. E. Adams) - Somehow the violet community seems to have either overlooked Mr. Adams' work or simply didn't find the time to fully appreciate what he had given us. Two of my favorite miniatures come from this understated Canadian hybridizer. The black green serrated girl foliage is adorned with single dark rose blossoms that sport a thin feathered white edge. 

Precious Red (Pittman) - Quite possibly the plant which will define Hortense's legacy. It's perfect in every way. The semidouble to double red blossoms are produced in mass atop the black-green, pointed foliage. If this plant has a flaw I haven't found it yet!


Tamsen (A. E. Adams) - Understated beauty might best describe this little gem. Single dark rose two-tone/thin green edge blossoms are beautiful atop the dark green girl foliage.

Semiminiatures

Dean's Cupid (Hobbs) - If you aren't growing this great variety you're certainly missing out. It's not one of these "wannbe" semiminiatures that looks like a miniature in disguise. The deep velvety purple blossoms contrast so beautifully with the deep green and white variegated foliage.

Tiptop (Pittman) - This little semiminiature does everything well...including standing the test of time. Introduced in June 1987, yes 23 years ago, it blooms profusely - and I do mean profusely and the foliage is a rich dark green which is a great contrast with the fuchsia/pink pansy blossoms. It shapes into a perfect rosette with little effort on the part of the grower.

Wee Be (Pittman) - A perpetual favorite of mine that has been around for over 22 years! Don't deny yourself the joy of growing this variety. I do have it on auction a few times a year so keep your eyes peeled!

Trailers

Happy Trails (L. Lyon) - Ruth Coulson from Australia grew the most spectacular specimen of this variety which was pictured in the African Violet Magazine (AVM) back in the mid 1990's. When that issue of the AVM hit member homes it caused a run on this plant so deep that it was impossible to get so much as a leaf for quite some time.

Spunky Trail (S. Sorano) - Is it a coincidence that my three favorite trailers come from Lyndon Lyon Greenhouses? This little trailer is just fun to grow. It stays quite small rarely growing larger than a baseball. It's little pink bell blossoms are freely produced over very dark green, shiny foliage.

Pip Squeek (L. Lyon) - This little gem probably won't win a best trailer award at your local show but it is just the greatest little plant to grow. This one too stays quite small and has dainty little pink star blossoms. Thirty two years after being released by Lyndon Lyon it is still going strong!

What favorites do you have and why?

Thursday, April 1, 2010

First Class 2 - "It's First Class!"

Several years ago one of the more computer literate members of the African Violet Society of America (AVSA) decided to take on the task of creating a software program to track the over 17,000 named varieties (a number that grows almost daily) of African violets. The program has evolved over the years and includes many pictures of the 17,000+ named varieties. It is a must have tool for the violet enthusiast and one that I highly recommend.


The cost for AVSA Members is $27.50. The cost for non-members $40.00. Click here to be directed to the AVSA website to purchase First Class 2.

African Violet Society of America (AVSA) Memberships

Unfortunately, the African Violet Society of America (AVSA) seems to be a well kept secret amongst violet enthusiasts. The AVSA has been in existence since 1946 and is dedicated to the cultivation of African Violets.

AVSA offers annual individual memberships for $30.00. Their membership magazine, The African Violet Magazine (AVM), is published six times a year and is included with your individual membership.

Membership information is available by clicking here.

Mystery Miniature African Violet

You found me!


Scroll down to see who I am!